
- Empty cart.
- Continue Shopping
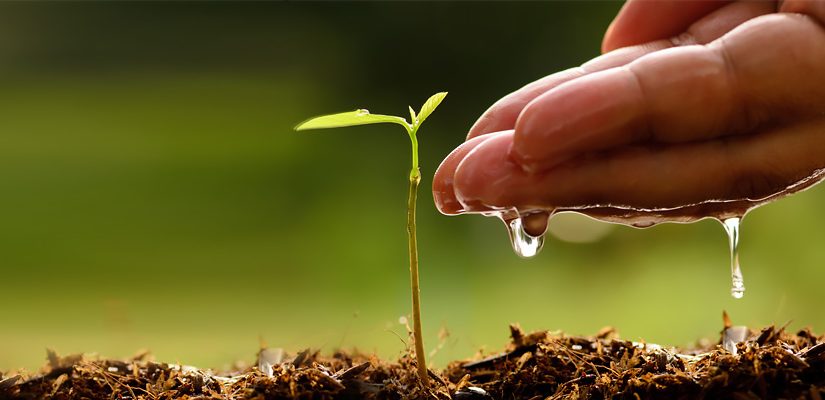
Planting and Caring of Tree
A tree is a tall plant with a trunk and branches made of wood. Trees can live for many years. The oldest tree ever discovered is approximately 5,000 years old. The four main parts of a tree are the roots, the trunk, the branches, and the leaves.
The roots of a tree are usually under the ground. Sometimes, roots are specialized into aerial roots, which can also provide support, as is the case with the banyan tree.
The trunk is the main body of the tree. The trunk is covered with bark which protects it from damage.
The leaves of a tree are green most of the time, but they can come in many colors, shapes and sizes. The leaves take in sunlight and use water and food from the roots to make the tree grow, and to reproduce.
Trees and shrubs take in water and carbon dioxide and give out oxygen with sunlight to form sugars. This is the opposite of what animals do in respiration. Plants also do some respiration using oxygen the way animals do. They need oxygen as well as carbon dioxide to live. Trees are renewable resources because they can continuously grow.
The Best Time to Plant a Tree
Trees (and shrubs) can be planted any time of the year that you can dig the proper planting hole. However, there are better times than others for multiple reasons.
Suffice it to say, the more time you can put between when you plant a tree, and the arrival of summer, the better. That makes fall the very best time of year to relocate trees and shrubs or plant new ones. Early spring is a popular time as well.
NINE IMPORTANT STEPS:
1. Planning : Right Tree at Right Place
Know your property and what space you have. Determine which areas you can most effectively shade, and then select the right tree for that location.
“Right tree” means the species and full-grown size of the tree is best suited for your home and the area you have available to plant the tree. You can reference our Yard Tree List to determine how tall your new tree will grow and how the species will mature over time. Keep the full-grown size of your tree in mind when selecting the right tree for your property.
“Right place” means the tree has enough space to grow to its full, mature height, and its root system has the space it needs to grow fully without interfering with surrounding infrastructure or underground pipes or utility lines. Don’t forget to plant to the west or east of your building to help reduce energy costs and save energy.
2. Dig a proper planting hole.
Once you select the prepare place and gather equipment to dig a planting hole. When preparing any hole for planting, make it three times wider than the current root mass but never deeper than the plant was growing in its previous environment.
An even better guide with trees is to look for the flare of the trunk near the soil level. Don’t place the tree in the planting hole so deep that any part of that flare is covered with soil. The truth is, even nurseries sometimes put plants in containers too deeply. Make a habit of checking this.
3. Ensure root ball is 1-2” above soil.
Placing trees and shrubs in their new environment with up to 25% of the root ball higher than the surrounding soil level. Then taper soil up to cover all the roots and add a generous layer of mulch above that. Newly disturbed soil tends to settle, and shrubs and trees planted at grade can quickly settle below grade and succumb to root rot or disease.
4. Loosen outside root from root ball
Once the plant is out of its container, look at the roots. If they are densely bound in a circular pattern or have started growing in the shape of the container (even slightly), break up the pattern.
It’s vitally important to stop this pattern now. The biggest mistake you can make at this point is to place a rootbound plant into the ground as is. Unless you break up the pattern, you’ve likely sentenced the plant to a slow death. At a minimum, it will likely never establish or reach a fraction of its potential.
Don’t worry about hurting the roots or losing soil as you break the roots apart or even cut some away. Better to give them a fresh start than allow the constrictive pattern to only get worse below ground. While you don’t want to be any rougher than necessary, do what you must to arrest the pattern.
5. Don’t amend the soil.
Contrary to traditional planting methods, contemporary research indicates that you should not amend the hole with additional organic material (unless you intend to amend the entire area where roots will eventually grow). Roots growing in amended soil rarely venture into harder native soil. The long-term affect is a smaller root system, reduced growth and a less hardy plant.
Instead, simply break up the clumps in existing soil, remove the rocks and back fill. Studies show plant roots growing in only the native soil did a better job at establishing and expanding beyond the original hole.
6. Eliminate air pockets
While you could lightly tamp or hand-pack the soil around the plant roots to ensure good soil-to-root contact, I prefer to add a stiff spray of water to the hole after back filling halfway. Not only does it provide needed moisture, but the water also helps eliminate air pockets that could otherwise result in dead roots or worse (without compacting the soil too much). Finally, water again gently but thoroughly once all the soil is in place.
7. Mulching
Helps save water and promotes healthy root growth. Placing mulch like wood chips around the base of your tree has many benefits, from reducing temperature, to keeping out weeds, to protecting from moisture extremes. It’s best to place mulch 2 – 4 inches deep and cover as much of the tree’s root system as possible. Keep mulch 4 – 6 inches away from your tree’s trunk.
8. Water Properly Until Established.
The most important job you will have after planting is to keep plants and trees well-watered until established. This can take weeks to months, to even a year or more in some cases. But don’t worry. You can put this part of the process on autopilot.
The key to proper watering and establishment is slow and deep irrigation. It’s not practical to do that by hand. The only way to establish trees properly through irrigation is with soaked hoses or drip irrigation.
The slow and deep irrigation allows the soil around the roots to saturate, so the roots have time to absorb the moisture, while avoiding excess runoff. Short, manual blasts of water from an overhead hose or sprinkler system simply don’t come close to providing the same effectiveness for water delivery.
I water newly planted trees every day for about the first week. For the next two weeks, I ease off to about every other day. Then gradually ease back from there.
However, there’s a fine line between watering enough and watering too much—especially with large trees that arrive with root balls wrapped in burlap. These trees have lost all their feeder roots when dug from the ground. Providing adequate water is critical to their survival and establishment.
If you sense the tree is responding poorly, and you are watering consistently, you’re likely over-watering. If the leaves are turning brown, drying up, and falling off, and the soil appears dry, water more.
To add to the challenge, soil that appears dry at the top may be very wet a few inches down. And the opposite is true as well. It is important to apply your detective skills based on observation and knowing how much or little you’ve been watering.
9. Fertilizing
If you plant to fertilize, I don’t suggest doing so until you know your trees or shrubs have taken to their new environment through successful establishment.
All energy should be concentrated on root development first. Adopt the walk-before-you-run approach.
While all the above steps are essential, your active engagement in monitoring newly planted trees for signs of distress over time will be the ultimate deciding factor in your tree planting success. Make any necessary adjustments in real-time, and you can likely reverse a potentially downward spiral into a tree that will live a happy and very long life.

